Category: Ladder laced Venetian gown

  • The lacing!

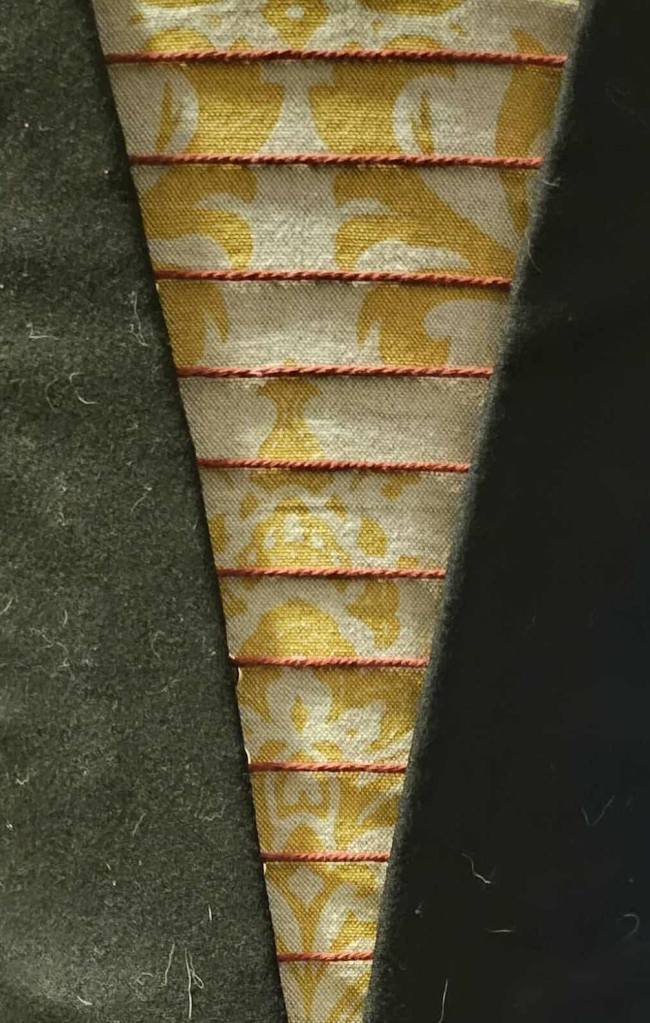
    I’d hit a wall on my Venetian mourning gown when I realized that, due to using a smaller and more squishy cording for lacing than on my previous gowns, my results weren’t what I’d experienced previously with this technique. Part of what I’m working on is documenting this different way that I create the ladder lacing using offset lacing rings, but this time, they weren’t successfully creating the parallel ladder lacing, which is the *entire* goal.

    But, unexpected results just mean a learning opportunity, right? So I pivoted and figured out a good alternate way of determining placement, rather than basic math that wasn’t taking the cord’s *squish* factor into account.

    First, I put the bodice with my first attempt at the lacing still in place around a pillow inside out. After I pinned it in place to keep things from shifting, I put a lined notepad between the pillow and the lacing so I could see where the lacing rungs were landing compared to the goal. I then removed the stitching from a ring I felt needed relocating, shifted it until the lacing was level, and then stitched it down before moving on to the next one that needed adjusting.

    This was added steps, but might be the makings of a better starting point for this method in the future! 😊

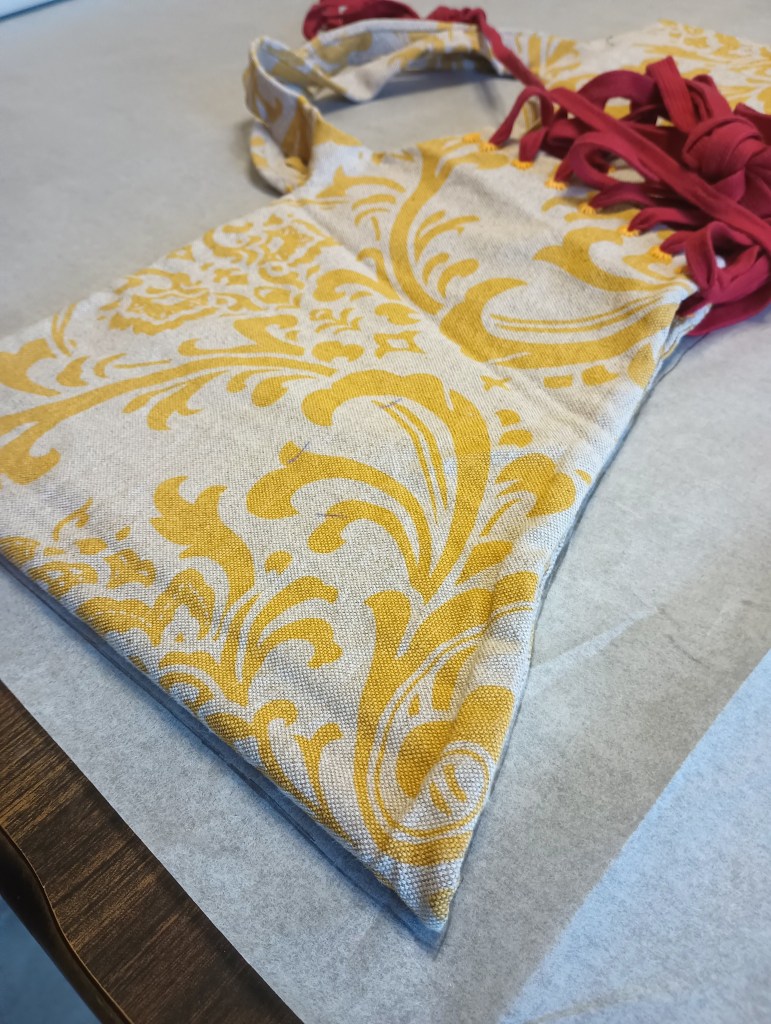
    The first two pictures are showing the inside of the bodice. The last pic is the current state of it while quickly trying it on tonight and I think I’m finally ready to move on to the skirt!

  • The bodice continues

    Project update – yesterday I sewed the vertical interior seams of the bodice main fabric and liner on the machine, inserted the boning in their homes, and started turning in the edges on the exterior of the bodice and stitched them down by hand to help keep things clean and crisp.

    Today I finished that up and tried it on so I could confirm things were on track and still lining up well even with the edges turned. To do this, I pinned together the extra fabric I left on each edge at the center front. This excess will be turned in when the lining and boning panel are attached, but for now it made this stage easier.

    I’ve also included a bonus picture of the support layers I have on under the bodice that make it possible to make up a lightweight gown without building in heavy support structures. I will be publishing my write up on that soon – life just got in the way for a while.

    Let me know if you have questions!

  • Mourning gown – mock up and other progress

    Today started with a successful mock up, so I cut the wool outer fabric and the linen lining, thinking I can skip interlining in hopes the resulting gown is at least a little less warm. I also got the boning cut to size and sanded and the cotton coutil pieces cut that I plan to sandwich the bones between inside both front edges of the bodice to help keep things smooth when laced.

    You may notice a different pattern in the last picture. That’s the one that had been misplaced and I spent time recreating yesterday! It had been “safely” stored with the ‘bodies’ supplies… I suppose it’ll be good to have a back up!

  • Re-patterning the bodice complete

    New pattern copies done. Next step: muslin (test run) to make sure I did that right before I cut into my “real” fabric.

    🙏

    That’ll probably be my goal for tomorrow, but I’m really looking forward to getting to the point I was at yesterday *before* I realized I’d misplaced the original pattern!

  • Mourning Gown Project

    I started working on my next personal SCA project: a late period Venetian mourning gown. It’s been a gothy dream for a long while, but I feel like current real-world reasons are telling me now is the time.

    First step – fabric has been chosen, purchased, and pre-washed/shrunk as best I was able other than the veil fabric that should arrive today.

    Next step – discover I’m missing my Venetian bodice pattern…

    Current step – recreate the pattern from existing makes, creating separate patterns in the process for the front lacing gown bodice vs. the side lacing bodies that were previously combined into one pattern.

    Inspiration and progress pics included – I’m trying to get better about this!

  • Aquaterra’s Arts and Sciences Championship

    This past weekend, I attended Aquaterra’s Good Yule event and entered my 16th-century Venetian-style gown in the barony’s Arts and Sciences Championship—and won! There was only one other competitor, so the competition wasn’t particularly fierce, but I’m still proud of myself for completing the entire process. From creating the gown last winter to putting together documentation and presentation at the last minute, I couldn’t have done it without the encouragement of the current Champion, Sigbjórg, who urged me to enter just a few days before the event.

    The project wasn’t so much about my sewing skills, or an intricately finished gown, so much as engineering that style to fit my body as well as accomplishing parallel ladder lacing rungs with a new method using period techniques—while ensuring I could still dress myself without assistance. I believe other recreationists could benefit from these techniques, so I’ve always planned to write it up, I just needed the push of a deadline to finally get started! The judges gave me some great feedback on improving my documentation, which I plan to refine before sharing it more widely. If I don’t finish by Ursulmas, it will be done soon after. (edited 10/7/25 to note – life happened, and I learned more along the way, so this is taking longer than expected, but coming!)

    Being a Champion comes with certain responsibilities, most of which align with my goal of leaning more into the arts. One of these is taking care of the A&S Champion’s regalia (the fancy drinking horn and tote bag) for a year, to pass on to the next Champion. I also received an Aquaterra Champion’s medallion and a lovely box to store it in, which are mine to keep!

    In other news, this was my first event wearing my new, beautiful circlet, which I commissioned from my friend Tabby (Tabitta Eliza Longtail), who will soon become our next baroness. That just made it even more special! The design is meant to be worn more like a headband since it’s more in keeping with the styling of my persona and is a more flattering style for me to wear. I love how it turned out! Thank you so much, Tabby!

    I also want to point out the beautiful site tokens created by Camilla. She made around 100 unique beaded necklaces for the event, which made for quite a display at gate!

    And finally, I’ve included my purchase from the dessert auction. I just couldn’t pass up the Krampus cookies!