
Including a special focus on two main efforts:
– Achieving the silhouette of the time despite clothing an extreme hourglass figure.
– Achieving parallel rungs on the ladder lacing using techniques we know were used elsewhere in period. This includes a review of some methods other modern costumers have published as well as a couple efforts of my own.


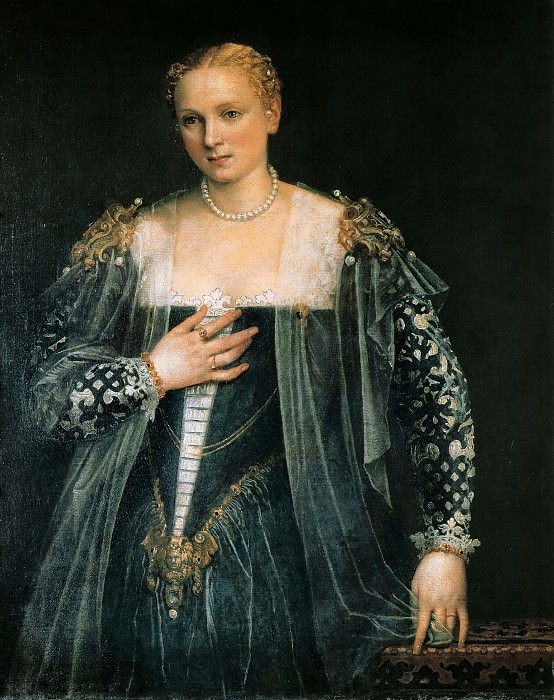


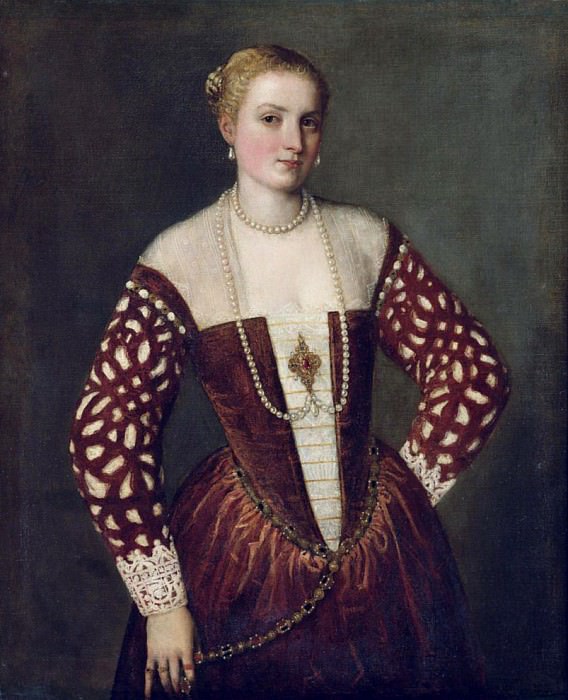

As you can see from these paintings, during a period of art known for striving for the accurate depiction of detail, the bodice of this style of late 16th century Venetian gown consistently had a smooth, conical shape with an open front closed by ‘ladder lacing’. None of the gowns in the portraits show the curves of a curvy body shape, though, so the question became, how does one meet the fashion of the time where it’s at with whatever body one has?
Unlike many other styles of the time, there aren’t any extant examples to study for how this look was achieved, so modern recreationists are left to speculate and experiment.
I believe they weren’t all done the same way since there’s different evidence in the pictures. Like some show a single piece of boning clearly on the front edge of the gowns while others very much don’t.
Here I will go into my current preferences and why, but you really should also consider the honorable mentions before that because they’re either also good, or good enough, and that’s all we really need if we want the style to be more accessible. The goal for me is ‘better than I was doing before, but not perfect all the time. Those portraits were evidence the gown could look perfect once primped for a picture, not that it could be perfect while in motion.
Now – how does one go from this:

To this?

Note: In my many years of pursuing this style, largely for the complete challenge of accomplishing this despite my extreme hourglass figure, I’ve viewed Morgan Donner as the lead in this pursuit, but here I present my changes to what otherwise can be learned from her Laurel Gown videos. Things not covered here should be able to be learned from her videos, but please ask me questions if you like!
First, a few mundane choices I made that affected the basic wearability:
Short waist
I found a better fit and longer wear was possible with shortening the length of the bodice, especially on the side and back, accommodating for my hip curves. This short waist look can be seen on some portraits, but not all, and I suspect it’s an indication of the person’s curves being taken into account, with the longer bodices more possible on less curvaceous bodies, but I’ve not tested this theory out on anyone other than myself. But, it’s worth noting that I can still get through the day, bending when I need to, with the waistline in the higher location, without struggling or bruising, now that I’ve made that change.
Stabilizing the straps
The question of how to have the depicted wide shoulder straps and keep them from falling down turned out to be having a high enough back that it holds them together and to avoid slack in the length of the straps. To help avoid these stretching over time, it might be worth lining these with coutil or cutting them separate on the grain, rather than having them on the bias.
The skirt
To determine where to cut the waistline on the skirt, I sewed the skirt panels together, folded them in half at the center front and back, and laid that flat on my bed. I then marked the waist edge in eighths on both the skirt panels and the bodice pattern pieces. The highest point of the hip curve then was matched up with the existing cut edge of the skirt, and the distance down from that point was how far down I marked the skirt panel for each of the corresponding eight marks. I followed this with drawing a gentle curve between the resulting marks. I added seam allowance before cutting and then I sewed a grosgrain ribbon at the top edge of the skirt. I flipped that edge down once, protecting the raw edge behind the ribbon, and pinned the pleats or gathers into place. The ribbon not only acted as a stay stitch for that that curve before working on pinning it in place, it gave the waist of the finished gown more definition by giving more body to those folds.
Hidden seam and slit on skirt
I don’t have a center front seam on my gown’s skirt, instead hiding the seam and the split (for making it easier to put on) behind the first pleat. I left the center front of the skirt unattached to the bodice, instead sliding it under the pair of bodies. The skirt is tied shut which allows for adjusting with one’s ever-changing body. The slit being offset also makes it easier to reach a pocket worn under the skirt. Since the portraits show a variety of gathers or pleats at different levels of perfection being used for attaching the skirts, it isn’t implausible that one can get creative with their recreation in this way.
Extreme bust support –Thought process and a Pair of bodies
Things we know:
– Eleonora de Toledo was buried with a separate stiffened bodice under her gown in 1562, but it had cardboard inserted instead of boning. I believe this was to help with keeping the smooth, flat shape of the style at the time, but was just a different method than the boning we know were used in pairs of bodies.
– It is believed that bodies were rare, but we know they did exist at least by the end of the 16th Century as the first extant set was worn Pfalzgräfin Dorothea Sabina von Neuberg when she was buried in 1598.
I decided I wanted to create a pair of bodies or I’d have to stiffen every gown I made even though we’re not certain bodies would have been worn at this precise time in period. They seem to be more structurally capable than a stiffened bodice would be, but I do hope to test a stiffened bodice in the future now that I have the rest of my support figured out. The lack of an extant pair of bodies in the 1560’s doesn’t prove that they didn’t exist a bit earlier and I believe my bust is a fair example of when one might choose to wear one when they weren’t widely used, but one is doing their best to be fashionable.
Dorothea’s bodies used a busk and whalebone boning, so I needed another option for boning. There is an extant pair of bodies from the next century that shows using bundles of bents (reedy stems of grass) as boning so I wanted to look for something along those lines for my version. For my first attempt years ago, I’d used bamboo skewers and made it as tight as I could. The result ended up being painfully tight though and despite that my body was squished into the hollow below my bust as it wasn’t actually being *supported* in the bodies. This resulted in turning my torso into more of a tube than a cone shape, which is a bit comical considering how extreme my hourglass figure is, but it meant I knew something else would be necessary.
When I consulted the ‘La Famègia Venièxian’ Facebook group, I was advised by Taran Daestingr that they had “sewed a pad (many layers of fleece in a linen pouch) to the inside of my corset under my bust to smooth the front of the bodice”. I had joked in the past about ‘stuffing’ that area of my bodies, and I imagine a person with my body type in that time period would’ve pursued the current fashion with the same troubleshooting that I have to do these days. Thus, the idea of creating an under bust ‘pillow’! I went with making it a separate piece to make cleaning it easier and to have the option to have different sizes on hand if needed. I’ll go into that process more below.
So, I got help from a couple folk with fittings to adjust the original pattern a bit, fitting it after ‘stuffing’ some folded fabric below my bustline. I saved the folded fabric so I could later compare against its size and density when working on the under bust support pillow.
When helping with the first round of pattern adjustments, Guiote de Bourgogne recommended I use rattan basket reed for the boning as I was still looking for a better boning choice. This option is readily available online, makes a reasonably flat result, and is affordable. For further stability, she suggested I use cotton coutil as the interior layer in place of the buckram (usually a linen stiffened with hide glue) used historically. The exterior and interior of my bodies are cotton canvas I purchased at SCA events. These bodies may not be entirely accurate, but they were effective and all natural, so as breathable as possible given the circumstances.



Underbust support pillow – the real magic
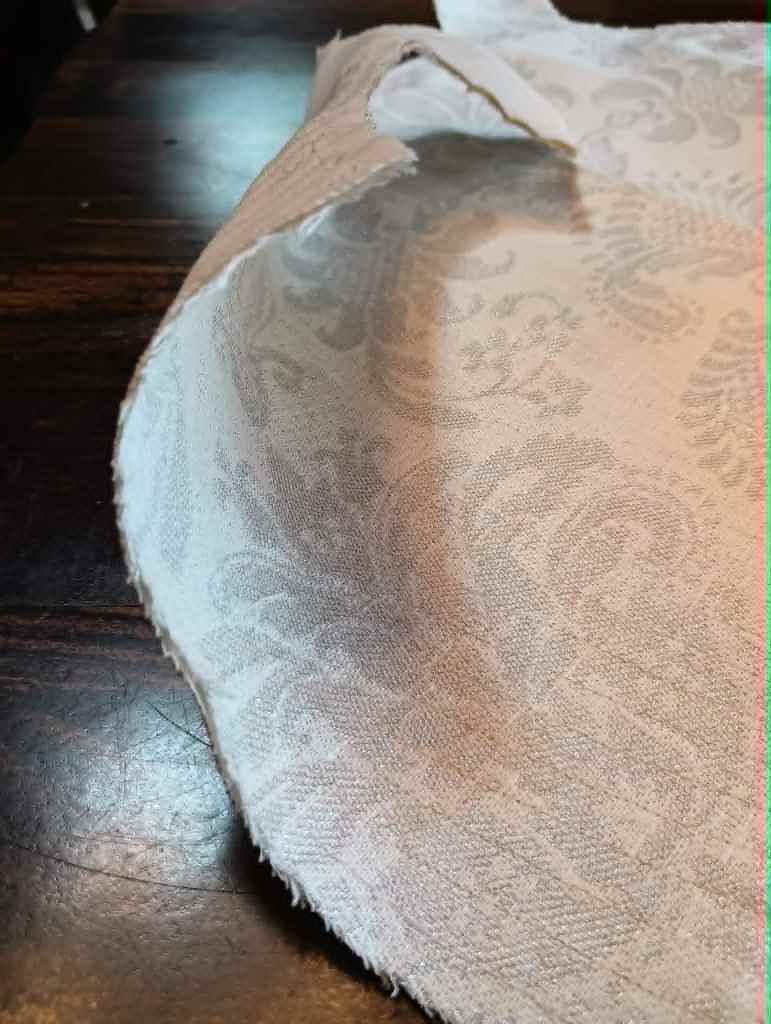
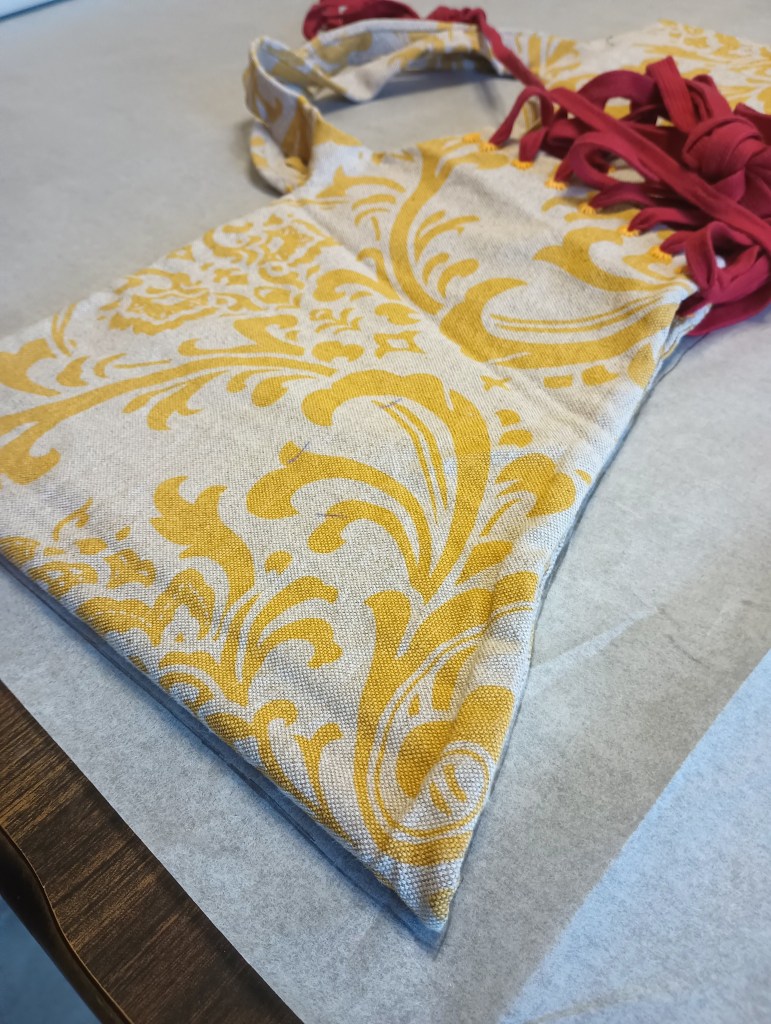
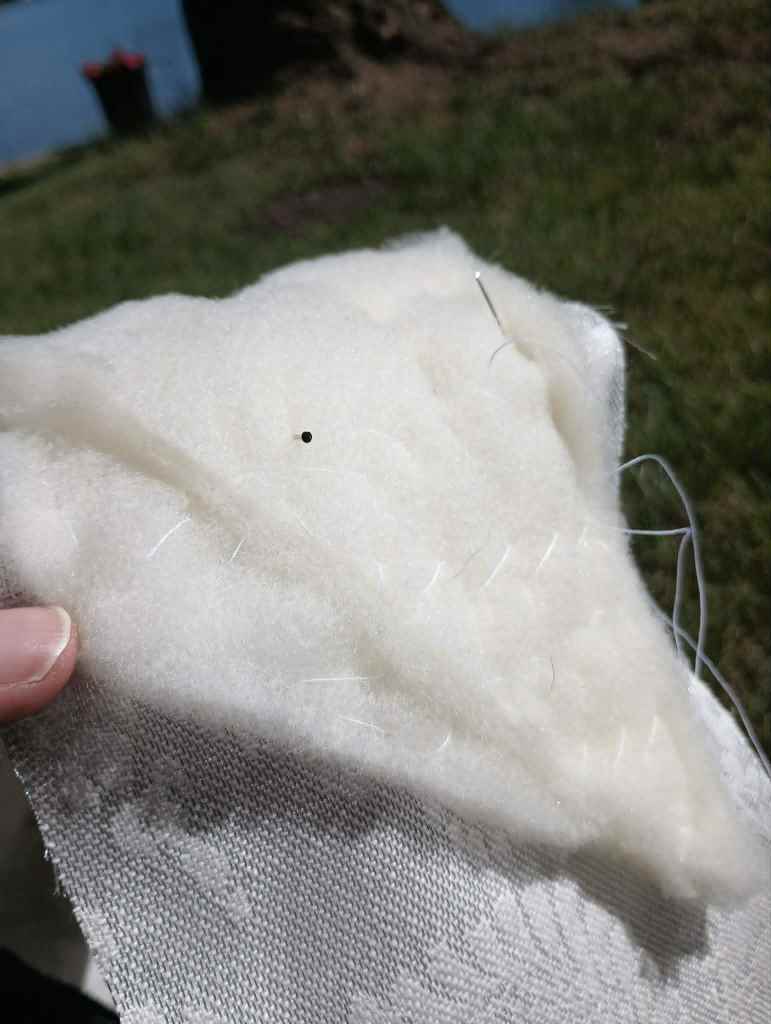
This ‘pillow’ was made by first testing how much and how dense the padding needed to be to support everything correctly and then pad stitching layers of batting to shape it properly to a base layer that was cut using the lower section of the front portion of my pair of bodies pattern. The exterior is more of the cotton canvas and the batting is wool, all in hopes of keeping my body temperature as well regulated as possible. I added a red velvet ribbon for tying the pillow on over my chemise, as red was a commonly chosen color for accenting undergarments.
Pad stitching is a type of running stitch that joins two or more layers of fabric together. This can be done to prevent shifting or to create curvature in the layers, both of which were helpful here. Here is a very helpful video by Bernadette Banner that fully explains the process and uses of this technique.
In these photos, you can see how much curve was created through the pad stitching process.



Bodice construction
Ladder lacing exploration
The final challenge was how to achieve parallel rungs on the ladder lacing for the gown itself, something so clearly depicted by the very particular artists of the time. Modern costumers have attempted to re-create ladder lacing method in many ways. Without extant examples, though, we don’t know how they created this look at the time, but most modern recreationists seem to either try setting up symmetrical lacing rings or eyelets, or follow a couple theories I first saw presented by Morgan Donner as explained here.
2 rows of ribbon: The first I saw on Morgan’s blog was to sew two rows of twill tape or ribbon on each side of the opening, sew ‘channels’ into the tape/ribbon for the lacing to run through, and lace through them in a ladder pattern. This technique works, but is *really* difficult to lace, especially on oneself, and doesn’t resemble other techniques I’ve seen used in period, and the rungs seem to *never* remain parallel, so I wanted to pursue something more suitable.
1 row of wider ribbon: In an effort to make sure I’d covered as many bases as possible in the costumer community, I purchased Margo Anderson’s pattern 009 and found that she used a similar method as above, just with one single wide ribbon on either side of the bodice. Appears to work a little better than two rows of narrower ribbon, but still isn’t giving the results I’d like, and is even more difficult to lace, even when not on the body.
Internal boning supporting the ribbon: More recently, for her Laurel Gown video, Morgan shows a technique of running the cord into a hole in the very edge of the front opening, around a bone in the edge of the bodice, and then out through the next hole. She pointed out that if the bodice ever became unlaced, it would be a LOT of work to re-lace. It also was still difficult to achieve the definitive parallel rungs, but it was much better than rows of ribbon provided. However, if a lacing hole is off, it would be a lot of work to undo it and redo it.
Modern ladder shoe lacing: The most successfully parallel that I’ve found online are the folk that do it the way folk ladder lace their modern sneakers. The lacing ribbon goes through the ladder pattern one direction and then doubles back to do the ladder pattern the other direction, so every ‘rung’ will have two layers of ribbon. This doesn’t appear to be what is done according to the portraits, but it *is* worth noting that it seems to have the most consistent results without a lot of re-working how to place the rings. Examples of this method can be seen on Instagram by creators @willoughbyandrose and @thejennylafleur.
Double rows of parallel lacing rings: I found somebody else who used two rows of lacing rings on each side of the bodice, but it still seems to have some of the same trouble with achieving parallel rungs, just less so. It also appears that this causes some visible lumps along the front edges of the bodice, but that could probably be resolved with a bit of boning. So not too far from the portraits and likely easier to lace than pushing through the ribbon channels that are most often recommended, though still room for improvement. Details for this can be found via Vitriolpoisoned’s blog.
My own efforts: Since I could still see trouble with those techniques achieving parallel rungs and they weren’t based on known period techniques, I kept theorizing.
Thinking this through, it seems the bodice, or at least the front edges, need reinforcement, stiffening, to keep the fabric from pulling or pinching with the lacing. Stiffening the entire bodice, likely with hide glue, is one option to achieve this, but it makes it much harder to clean the gown at that point, and having bodies under the gown that can be adjusted on the sides as needed helps keep the conical shape through the whole upper body, so there’s not a need to heavily stiffen the gown as well. Instead, I added a few bones on both sides of the front of the gown for some simple support, just to help keep that front edge straight.

By my latest gown, I also found that wrapping the front edge of the bodice over more tightly when sewing it down to the inside helps the front edge curve a slight bit inward, better concealing the lacing rings, which I also started placing a bit further back from the edge than I’d initially tried. I still need to go back and adjust this on my earlier gowns.
One method I’ve personally used somewhat successfully was based on this style (Portrait of a Young Woman – Paris Bordone – About 1545) from a couple decades prior to the ladder lacing styled gowns. Instead of tying the separate ribbons together in the middle, though, I tied them off on the side and hid them behind the bodice panels. This was successful in achieving the look and allowed for the fluctuations in size, but it was incredibly frustrating and time consuming to manage to do and undo every single time.
I also considered creating a busk with parallel eyelets built in, so the busk could keep the bodice stiff while also preventing the tension of the lacing cord from being able to pull at the holes. And when in the middle of creating a sample, it clicked – the lacing cord tension was the problem, and needed to be accounted for.

What I finally figured out was a very simple change in the placement of my lacing rings.
Lacing rings are a known period technique, and we already know that we sometimes place rings or eyelets one way for spiral lacing and another for crossed lacing, so I believe it’s reasonable to think one might change the placement of the rings or eyelets to accommodate yet another fashion.
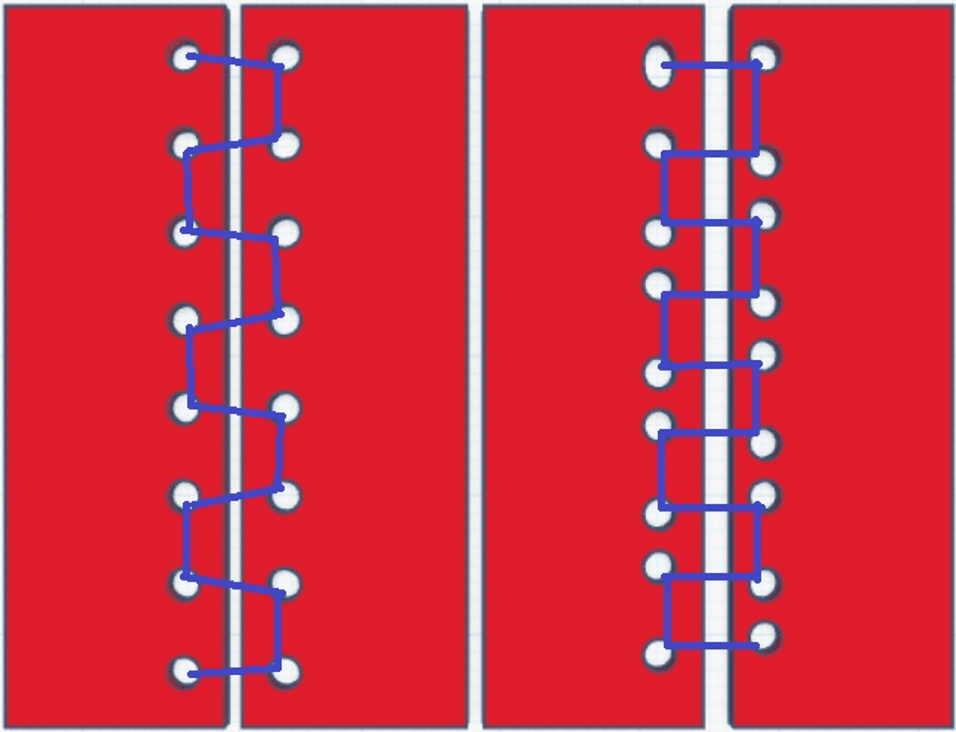
Symmetrical rings cause slanted rungs because the tension of the cord/ribbon will always pull it to the “corner” of the ring or eyelet, due to receiving both vertical and horizontal pressure at each point, as shown on the left in the diagram below. On the right, you can see that by moving the ring to account for the pressure of the cord, a much more parallel ladder rung can be achieved.
I can readily lace this myself and easily change out the lacing anytime I want. If a ring is in the wrong place, it can be detached from the gown and placed again without having to remove the lacing entirely. This also shifts well when the front V of the gown changes, which makes it functional for fluctuating bodies. Ribbon is still able to upset this look by twisting, and stiff ribbon or cord is harder to bend around the corners, so I recommend round cord that isn’t *too* stiff for the best results.
I have found that the size/density of the cord matters for the placement, so be sure to use the same type as you use when placing the rings. After some experimentation with measuring and other complicated efforts, I found that the most approachable way to figure out the placement was to stuff the inverted bodice with a pillow or something that can fill it out, and secure a lined piece of paper between that surface and the bodice so you can see where the lacing is laying down.
This technique isn’t always perfect, but for me it has been able to achieve the best results so far without straying from the portraiture.
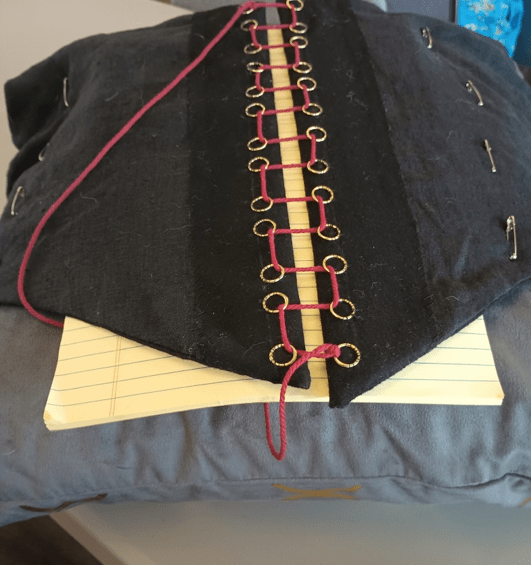
Above: A bodice inverted and stuffed with a pillow with lined paper layered in between.
Below: A close up of the resulting lacing from the inside with the lined paper to show how close the rungs are to being parallel (left) and from the outside (right) over a pair of bodies.


My heraldic 1560’s Venetian Gown
My color choices for my initial gown using these techniques were based on my SCA device colors and my ribbon was chosen to join in the 2024 12th Night Pride activities. But in the process of this last minute pivot, I figured out that down the road, with just a few quick pins and a wee bit of fabric, I can change out (cover) the front of the bodies to resemble a new stomacher without all the work and have a whole new look!

Got questions?
Feel free to reach out.

